Friday, July 20, 2012

Ten Tips For Taking Bird Pictures Like A Pro In Your Own Backyard

Planning your photos in advance increases you odds of getting great photos. This male Bluebird often hovered over his mate during the mating season

I’ve been a professional wildlife photographer for years and travel all across the country to take pictures. It’s a great job, but somebody’s got to do it. I’ve crisscrossed the United States from north to south and east to west. Winter, spring, summer or fall, I’ve been there. Still, my favorite place to take photographs is my own backyard. I know it like the back of my hand. Hundreds, maybe even thousands of birds visit my bird feeders every year. I’ve spent so much time out there that I recognize a good number of them individually. Most of my best-selling shots are of birds that I’ve known for years.
Very few of my shots are random. When I walk out the back door, I usually have a plan for what I want to shoot that day. Certainly birds and animals are somewhat unpredictable, so I don’t know exactly what I’m going to get, but whatever is presented to me, I’m usually ready for it. Let me share with you the ten steps I use to get the shots I want.

Tip 1: Pick your subject

I select the camera/lens combination based on the species, or at least size of bird I want to photograph that day. I don’t use the same set-up for tiny Hummingbirds that I use for larger birds such as Blue Jays. I find that NOT concentrating on something specific leads to missed shots. The best way to get the once-in-a-lifetime photo is to be ready for it when the opportunity presents itself. 

Male Pine Warblers often visit my suet feeders in late March

Tip 2: Learn Behavior

If you know a bird’s behavior, you increase your chances of getting great shots. You don’t have to do a lot of studying – just observe the birds in your yard. How often do they come to the feeder? How long do they stay? What do they eat? How do they interact with other birds? I often find that individual Hummingbirds will come to a feeder on a set schedule that varies by less than a minute during the day. They often feed exactly the same each time they visit. Knowing this is all the advantage I need.

Tip 3: Anticipate Behavior

My reflexes are slow compared to those of birds. By the time I see the scene I want and communicate to my finger to press the shutter button, it’s usually too late. Often, though, there is something that will signal you that good things are about to happen. Baby Tree Swallows looking out of a birdhouse start squawking a few seconds before the parents show up with a meal which allows me to start shooting before they get to the nest.

The baby Tree Swallow would announce the anticipated arrival of the parent with food

Tip 4: Plan For Good Light

Study the light in your yard. Light is best in early morning and late afternoon, but often shadows from trees block the light. Look for places in your yard where the light is still present at these times. Pictures taken at high noon on sunny days will be harsh. If you can only shoot at mid-day because of trees, choose days that are overcast, but bright.  

Birds often get into habits like this Bluebird that likes to bathe in the afternoon

Tip 5: Watch Your Background

There’s an old saying that if something doesn’t add to the picture then it takes away from it. You don’t want the subject of you picture to get lost in the clutter. It should be prominent enough to make a statement.

Tip 6: Control Depth Of Field

Using a wide aperture gives a shallow depth of field (DOF) and allows for faster shutter speed. A shallow DOF blurs the background and allows you subject to stand out. Most lenses are sharpest about one stop smaller than the widest aperture.

Out of focus flowers and a shallow depth of field make this Hummingbird stand out against the background

Tip 7: Compose Your Shot

Before you start shooting, consider what you want the shot to look like. Do you want a tight head shot, or a wide shot of birds playing in a birdbath? Knowing this will help you decide where to set up and what length lens to use.

Tip 8: Focus on the Head

Another old saying is that nobody gives a rat’s ass about the ass. You can cut off any part of the body in a shot except the head. Focus on the head (especially the eyes). Try to get the bird looking at you or almost perpendicular to you with the beak ever so slightly towards you. You don’t want to get the shot from behind or with the bird looking away.

The use of a blind can allow you get close – especially if you let the bird come to you

Tip 9: Use a Tripod

Nobody really LIKES to use a tripod. They are heavy and limit your ability to move. They offer tremendous advantages, however. First, shots taken from a tripod will be significantly sharper. Also, if your camera is on a tripod, it will be ready to shoot and there will be less movement from getting the camera in position. The less you move the camera, the more likely the bird will remain where you want it.

Tip 10: Use a Blind

A blind doesn’t have to be fancy. There are commercial pop-up blinds available for less than $50, but even a simple sheet draped over a ladder or a fence will do the trick. You will get your best shots when the bird comes to you rather than the other way around. They will be far more comfortable if they feel in control. Also, some sort of covering will help keep you out of the sun. I have a large home-made blind on wheels that I keep out in my yard. The birds are so used to it that they often perch on it while I’m in it. I even have birds land on the lens of my camera and peek in at me.

This shot combines everything. This male Cardinal has a favorite perch near a sunflower seed feeder. I used the blue sky as a background. He came close because I was in a blind. His head is at the right angle. I focused on the eye. I caught a shot showing some behavior.

A Final Word

The most important thing that I have found about wildlife photography is to enjoy the time that I spend doing it. Learn to appreciate the wonderful things you see whether you get photos or not. If you follow my advice, by design there will be certain shots that you will miss because you just aren’t set up for them (too much or not enough lens, for instance). Think of those instances not as missed opportunities, but as scouting missions for the next photo session. Perhaps you will come to find that the family of Bluebirds comes to the birdbath every afternoon to cool off or there is a Grosbeak you didn’t know lived in your neighborhood that likes the safflower seeds in the feeder.

You may never know exactly what you are going to get, but with a little planning and observation, you might just get that once-in-a-lifetime shot in your own backyard. I get them all the time.

Steve Byland is a wildlife photographer living in suburban New Jersey. His photos can be seen at www.stevebyland.com – many of which were taken in his own backyard.

Thursday, July 12, 2012

How to Photograph Birds Crossing the Moon

Snow Geese crossing the moon in late afternoon - notice that the moon isn't quite full

Using the moon as a background in a photo can make for a really fantastic shot. A shot of a bull Elk bugling with the moon so large that it fills half the scene or a flock of geese passing in front of a full moon can be pretty dramatic. Unfortunately, the better the shot, the more likely that people will assume that it has been photoshopped – actually, not too bad an assumption.

If you think about it, such shots can be incredibly tough to get. The moon is only full (or nearly full) a few days each month. The sky has to be clear, and the subject needs to be positioned properly. Photos with the moon rising are particularly difficult. The window for getting such a shot is incredibly short. The moon is only positioned properly on the horizon for a minute or so. It’s no wonder that people assume that such photos are more the result of time spent at the keyboard rather than behind a lens.
I’m not saying that there is necessarily anything wrong with digital manipulation (unless you try to pass it off as the real deal). The problem comes when the artist puts together two objects together that aren’t possible to capture in the same frame. An extreme example would be a setting sun next to a full moon – two objects that are never next to each other in the sky. Most people would catch that right away, but there are other, more subtle things to look for that may make you suspect shenanigans.

More Snow Geese

The best way to tell the difference between a (potentially) manipulated shot and the general article is often a matter of perfection as well as imperfection. A photoshopped photo will generally contain both elements. Consider the position of the full moon relative to the sun. A few days before the moon is full, it rises before sunset. The full moon rises as the sun sets. You won’t have a completely full moon out during daylight hours. A completely full moon against a bright blue sky with a Bald Eagle crossing it just can’t happen, however, an ALMOST full-moon against a beautiful blue sky IS possible one or two days each month. Another problem comes from depth of field. Having the moon with other subject all in relatively good focus is no easy task, especially if the second subject is moving. Getting the moon to fill the frame requires a long lens. Getting all of the elements in focus requires great depth of field, which comes at the price of high ISO (introducing noise) and/or slow shutter speed because of a small aperture. In other words, don’t expect to get a crisp shot of a Peregrine Falcon crossing the moon.

Digitally manipulated shot - the focus on all subjects (especially the moon) is too sharp. This was made from the next two photos - California Condors, BTW

Now that I’ve established how difficult it is to come by great shots of the moon with wildlife, let’s look at how you can get such a shot in the real world, without the help of a software program. If you know what situations ARE possible, you can put yourself in a position to get some pretty dramatic photos. As I mentioned before, a few days before the moon is completely full, it rises before sunset. That isn’t perfect, but it can be close enough. Another thing that works to you benefit in these conditions is that the sun will be at your back, which IS perfect for many shots. You might be lucky enough to just find yourself in the right place at the right time, but you can dramatically increase your chances with a little planning. Find a table that tells you when the sun and moon rise and set and circle those days when the moon rises an hour or two before the sun sets to capture a nearly full moon against a blue sky. Alternatively, if you want silhouettes against a full moon, you’ll want to be in position while the moon is still low in the sky. The best time of year is often winter when the air is cold and haze is at a minimum.
       I didn't follow my own advice - I focused on the moon. The Condor was too close and ended up out of focus.
I’ve had the most success with the nearly full moon against a blue sky which occurs just before sunset. The reason for this is that it is still light enough to see the birds coming, which allows enough time to react and shoot. Also, monsters come out after dark, especially when the moon is full. Everybody knows that. Another advantage of shooting in the late afternoon is that many birds are flying at this time of day in order to get to where they plan to spend the night. I have had the best luck with ducks and geese as there tend to be lots of them, improving the chance of success. That pretty much covers “what” “where” and “when,” leaving us with “how?”
Condors in better focus - no moon

If you’ve ever taken a photo of the moon, you know how small it will appear in the picture. To make the moon appear large, you need to use a long lens. I recommend 400mm at a minimum, but preferably longer – as long as you’ve got. You’ll also want to use a tripod and a remote shutter release. The idea is to mount the camera on a tripod and watch for birds that might cross the moon. When they approach, you hit the shutter release, but first things first. As mentioned earlier, you want plenty of depth of field to have the moon and the birds in fairly good focus. Ideally, shoot in manual mode.  Try to get and exposure that provides an aperture of about f/9 or better and a shutter speed of 1/500th or faster. You’ll need to adjust the ISO to get the overall exposure right. Take some test shots and check the histogram. Where to focus is a challenge. If you focus directly on the moon, the birds will be soft and vice versa. Focus manually (you don’t want the camera hunting when it counts), take some test shots and adjust as necessary. Error towards having the moon in focus if the birds are silhouettes and focus more on the birds if it is light enough to see detail on them.

Sort of a bonus shot - Snow Geese Flying in front of setting sun
Once you have everything set up, stand back with the camera pointed where you want it and watch for birds approaching the moon. With the camera set to take continuous shots, start shooting before the birds get to the moon and continue shooting until they are past. You might have to adjust a bit if you have a low burst rate. Keep checking your histogram. It is very easy to mess up the exposure as the moon rises and the sun starts to set. This isn’t going to be easy, but it will be fun and when you do finally manage to nail a couple of shots, it will be worth the effort that went into it.

You can see thousands of my photos at http://www.stevebyland.com/ They are all available for sale as prints or license. I can be reached by email at sbbyland@aol.com


Monday, July 9, 2012

Attract More Vultures To Your Yard


Say What????

Pair of Black Vultures
Okay, so Vultures aren’t up there with Cardinals and Goldfinches when it comes to what most people think of as “desirable” yard birds, but I still like them. Besides, I’d rather have Vultures than Starlings. Vultures never moved into a Bluebird nest and they haven’t taken up residence in my garage (thank goodness). In fact, aside from their peculiar habit of eating the windshield wipers on tourists’ cars in the Everglades, I’ve never heard of Vultures doing anything bad. Besides, the windshield wiper thing is pretty funny to watch, as long as it’s not your car they’re eating.

Turkey Vulture
Vultures are nature’s garbage collectors (or, maybe they prefer “sanitation engineers”). Since the towns in my area stopped picking up roadkilled animals due to cutbacks, the Vultures have stepped up to the plate (so to speak) and have taken on the task of keeping our cities clean. On top of that, they don’t demand pensions and never take a day off. In my part of the country, we have two species of Vultures – Turkey and Black. They aren’t that closely related, but they look fairly similar.

Turkey Vultures have silver and black under wings and a longer tail

While Turkey Vultures fly effortlessly, often going for hours without beating their wings, the heavier Black Vultures have trouble getting off the ground and seem to beat their wings franticly to get airborne. Turkey Vultures are one of the few birds with a well-developed sense of smell and are frequently first on the scene. Black Vultures are the more aggressive of the two, flying high in hopes of spotting Turkey Vultures feeding and then moving in and pushing them aside, but enough of the ornithology lesson.

Black Vultures have white patches at the wingtips and a shorter tail

I began feeding Vultures about ten years ago when I came across a dead deer in my backyard. I thought about dragging the thing into the woods, but then decided to move it into the yard a bit. I put it behind a tree so that it couldn’t be seen from the kitchen window. At least I have SOME common sense. My wife soon noticed about a dozen large black birds in the trees with more circling overhead and asked me what was going on. I confessed to dragging the carcass under the tree out of sight. She was upset and demanded that I move the body into the middle of the yard where she could watch the activity. I KNEW there was a reason I married her. In just a few days, the huge mess was reduced to a small pile of fur and bones that easily fit into a trash bag.
I have lots of gruesome shots, but there is a chance that you might be eating

A couple of months later, I drove past another carcass on the side of the road near my house. I looped a short rope around a leg, tied it off to the bumper of my truck and dragged it home. As I bounced off the street and onto my lawn, I saw my neighbor standing by his mailbox with a look on his face that could best be described as “horrified.” Oops – Busted! He followed me into the backyard to find out what on earth I was doing. I fessed up to my social faux pas. The next day, he came over to see the activity around my new “feeder” and told me to call him if another such feeder became available so that he could have one too. Now, THAT’S a good neighbor.
The heads of ADULT Turkey Vultures turn red

Over the years, I have put out a variety of things for the Vultures to eat. They aren’t very picky. In fact, the worse the offering is, the better they seem to like it. They make very short work of such things as the remains of the Thanksgiving Turkey or a package of roast beef that went bad in the back of the refrigerator. I presented my boldest offering two years ago when I pulled a frozen turkey out of the freezer that had been there for three years. There was no way that I was going to eat it. It was the middle of winter and the snow was deep so I took plastic wrap off the bird and carried it out into the yard. I worried that a coyote or fox might drag the still-frozen thing away, so I drove a long piece of rebar through it to hold it down. Did I mention that the location I choose was right outside my bathroom window and visible from the street? I wanted to get pictures and didn’t feel like standing outside in the cold. It would be much more comfortable, I figured, to set up a tripod in my bathroom and shoot through the open window.

The heads of Black Vultures are always dark

The next day, there were Vultures flying low over the yard and perched on the roof of every house in the neighborhood. More were on my roof, of course, than anywhere else. This time, my neighbor called me to ask what was going on (too cold out to stand by the mailbox). I confessed to what I had done and, again, I could hear the jealousy in his voice. Actually, he was dead silent, but I knew that he was green with envy. As it turns out, a rock-hard turkey that has been frozen solid for years takes the better part of a week to finish off. It makes me wonder why they aren’t sold in the upscale bird feed stores that are down on the highway.

This is as bad as I’m going to show – raw turkey at its finest

If you decide to follow my example, make sure your keep your expectations realistic at first. It may take a couple of weeks for the Vultures to get interested in your offerings. You can put something out at any time of year, but the summer heat seems to help the process along. Keep in mind that Vultures are wary, so it’s probably best not to put a carcass too near the house (like on the patio or next to the pool), until they get comfortable with your yard. Also, offer a variety of food – nobody likes to eat the same thing every day. Above all, take the time to smell the roses, so to speak. Enjoy your new bird friends and send me a photo of your successes.

Steve Byland is a wildlife photographer living in suburban New Jersey. His photos can be seen at www.stevebyland.com – many of which were taken in his own backyard. He can be reached by email at sbbyland@aol.com.

Thursday, May 3, 2012

The Man Cave

View of the front - note the wheels
and the foot rest under the cameras

A lot of people who know me have heard about “The Man Cave,” which is my own, custom-build blind that I use for photography in my backyard. If you don’t know me (and I can’t imagine WHY you would be reading this if you don’t, but we’ll ignore your lack of judgment – for now) I am a professional wildlife photographer. I have used a variety of blinds for a number of years – mostly those pop-up camo blinds, in order to allow my subjects to get closer to me and to keep me out of the elements – more or less. They are a great tool, but they wear out, blow over in strong winds and you have to take them in and out every day. They can also get a little cramped inside with tripods, chairs, coolers and such.
A little plastic on top helps keep out the rain

About two years ago, I decided that I wanted something a bit more permanent. I knew the basic elements that I wanted – weather resistant, solid and movable. I even knew the size (4’ x 5’ x 6’ – W x L x H). Now, all I had to do was build it.

Run-flat wheels were a later addition
I got a flat early on - AAA does not service photo blinds

Sunday, May 22, 2011

Taking Wildlife Photos In The Rain

Black-chinned Hummingbird during an Arizona Monsoon
400mm, ISO 400, f/5.6, 1/40 second

Many photographers will tell you that there is never enough light. Maybe it would be better to say that there is never enough PERFECT light. To me, with the exception of a poorly cooked hamburger, nothing is more disappointing that having a photo that is both underexposed and overexposed at the same time. For example, an adult Bald Eagle flies by, banks perfectly and still, the body feathers are too dark and the white head too light so that you lose detail on both ends.

This is an example of a photo that came out poorly
because of too much light on a bright sunny day

This is usually not a problem during the “golden hours” which are thought to be an hour after sunrise and an hour before sunset. The golden hours are also known as the “magic hours” or, as I like to call them, about two hours before I haul my butt out of bed and an hour after my feet hurt so badly that I can hardly walk anymore.

Eastern Bluebird - if you look closely, you can see rain on his back
600mm, ISO 500, f/7.1, 1/320 second

Saturday, May 21, 2011

End Of The World Photos

Man Cave

You might not know it if you just watch the regular news, but the world is supposed to end today – sometime this evening. You would THINK that this might make the news, but apparently not. Now, as some of you know, I built a “man cave” a few weeks ago as a heavy-duty blind from which to take photos. I don’t mean to imply that this will protect you in the case of the world’s end, it just fits into the events of today.


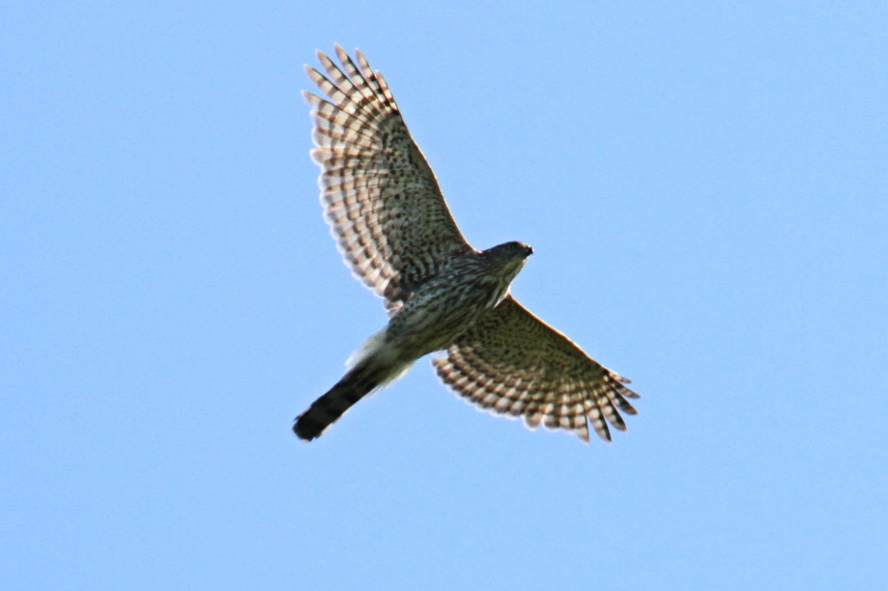
Juvie Cooper's Hawks Terrorizing the neighborhood today
Note: Raptor vs Rapture - very important difference

Side note – APPARENTLY the world isn’t actually supposed to come to and end, per se. Instead, all the good people will go up to heaven and leave the rest behind. Again, very skimpy reporting. After what I believe was the deadline, I began calling those people that I figured might be among those going to heaven. No answers from any of them. I guess that means that I might have missed the cut. If that’s the case, I am going to stop recycling.


Hummer made a showing today

Monday, May 2, 2011

House Wren Nest Building

Lots of birds building nests in the yard this week. Eastern Bluebirds have 4 eggs, while the Tree Swallows and House Wrens are working hard on their nests. While generally efficient nest-builders, one particular House Wren seems to have a bit of a problem with measurements.

Step One - Select stick of correct size:

 
Step Two - Check your measurements:


Step Three - Slam that baby home!

Thwang!!! (Ouch)

Step Four: Celebrate your successes:


Lots of recent Bluebird Pic can be seen here: http://www.flickr.com/photos/steve_byland/

You can see thousands of my photos at http://www.stevebyland.com/. They are all available for sale as prints or license.