Nothing says “fun” more than a TODO list – especially if
that list was put together by someone else. The mere fact that you are reading
this means that you either clicked on the wrong link, or are intelligent,
good-looking and interested in self-improvement – of course, I could be wrong.
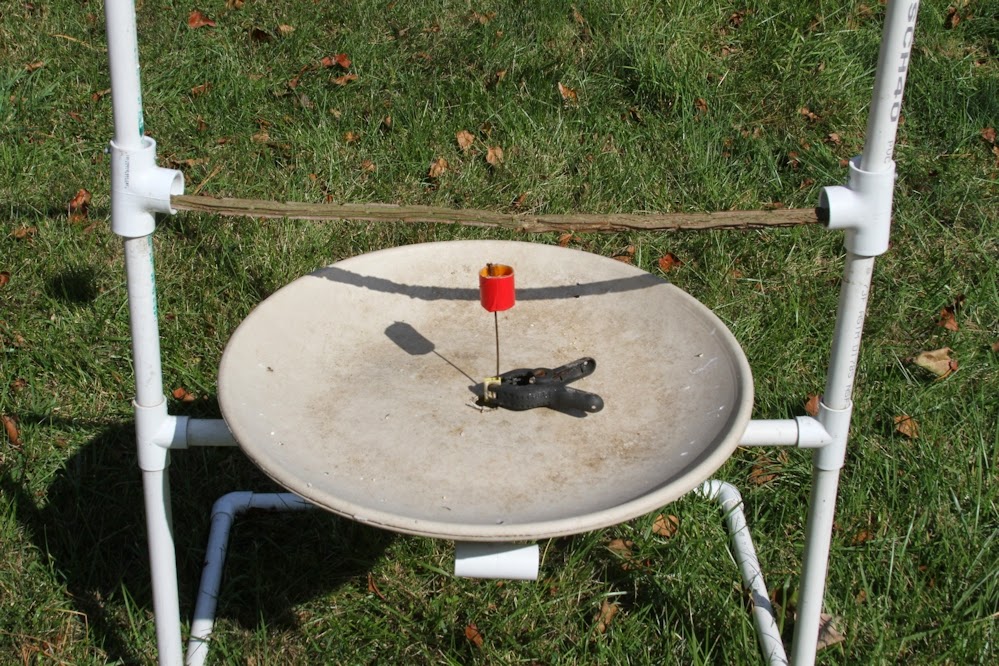
Everyone gets into a rut sometimes. One day I was bored and
decided to try to get a photo of a hummingbird drinking from a straw. Little
did I know that getting the bird to drink from the straw would be the easy
part. Getting the sugar water to the top of the straw, keeping it separate from
the water in the glass, and keeping the straw from moving around were much more
of a challenge.
I decided to put together a list of exercises while trying
to take a nap today. I should have been doing something more productive, like
watching television, but I had a migraine and was tired of playing games on my
computer.
A couple of notes, before we get started. You are not
required to do all 100 exercises – you probably do most things in a half-assed
manner, so why should this be any different? Also, it’s best to ask permission
before taking pictures of people, or someone’s property, and, it’s a very bad
idea to take photos of minor children without their parent’s permission (and is
even illegal in many places).
Most of these exercises take a fair amount of time. Unless
you are willing to ignore your job and family, it could take the better part of
a year to get through all 100 exercises. Of course, if you DO make the
investment of time and effort, at the end of it all, you will be able to
proudly say, “What the HELL was I thinking?” The first two items might better
fall into the category of “taking better pictures” rather than unleashing your
creative inner self, but I want to make sure you get off on the right foot. Let’s
get started.
1. Spend a day shooting in “Manual.” If you don’t use manual
mode, it’s time to start. It’s really not that difficult. In an hour or two,
you should really have the hang of it. ISO, Aperture and Shutter Speed – not all
that complicated. Many serious photographers never progress past Aperture Priority.
The problem is, in every mode other than manual, the camera makes decisions for
you. It tries it’s hardest, but it makes a LOT of mistakes and can turn you
potential masterpieces into second-rate snapshots. Remember, there is no law
that you have to get the shot perfect the first time. Shoot, review and adjust.
If you pick a sunny day where the lighting conditions aren’t changing much (as
they do when the sun peeks in and out from behind clouds), manual is the way to
go. Besides, it lets you sound snooty – “Oh, I shoot in manual.”
2. Turn on the Histogram. Oh, quit whining! Find the manual
to your camera, or download it on the internet and learn how to turn the
histogram on. While you’re at it, find the feature that makes the photo on the
display blink if you have over-exposed anything. THIS IS THE SINGLE BEST WAY TO
MAKE SURE YOU EXPOSE YOUR PHOTOS CORRECTLY. If you don’t know how to read a
histogram, do a little research on the internet – there are lots of sites that
explain histograms. Most people think that you want to make a histogram that
looks like a bell-curve – WRONG!!!!!! If you take a photo of a black crow in
snow, the histogram will look like the letter “U.” The goal is to push the
photo to be as bright as possible without over-exposing anything. Too light,
you get “blinkies” that tell you that you have blown out the whites and you can’t
get them back. Too dark and you end up with a mediocre shot. If you have to
brighten your photo on the computer, you will hurt the quality and introduce
noise. If you haven’t used the histogram function before, take your time to
learn it. It will improve the quality of your photos immeasurably! Take a test
shot, check the histogram, and make adjustments.
3. Try to reproduce a photo you like. This can be fun at
places where they sell postcards of the local sites. Copying a professional can
give you some insight as to composition, lighting and such. In grade school, it
was called “cheating” and you’d get expelled. In business, they call it “benchmarking”
and reward you. Of course, you shouldn’t be afraid to add your own creative
touches as well.
4. Find a lens that you never use. Better yet, borrow a lens
that you’ve always wanted and spend an afternoon playing with it. Explore the
strengths and weaknesses of an unfamiliar piece of equipment. When you load the
photos on the camera, review them from last to first. Hopefully, you will
notice the photos getting WORSE as you go back in time, meaning that you got
better as you went along.
5. Get Low. Pretend that you are a puppy or a snake and take
photos from THEIR perspective. I once watched a video taken by attaching a
video camera to a cat and let it run around the neighborhood. It was amazing to
see things from the perspective of the animal. Take photos of everyday items
from the view of the animal. Trees, furniture and even people look very
different from down there. From a practical standpoint, a ground level shot of
a duck on a lake can be very dramatic. A picture of a duck taken from a
boardwalk looking straight down on that same duck is just a picture of a duck.
6. Custom Modes. Time to get out the manual again. Many
cameras have one or more custom modes that allow you to save settings. If your
camera has these, they are worth their weight in gold! When I was in
Yellowstone, I set C3 for birds in flight (multiple focus points and AI Servo
focusing), C2 for more stationary subjects like elk (single focus point, single
shot focusing), and C1 for HDR landscape shots (single point focusing and
bracketed exposures). When I saw something I wanted to photograph, I would just
turn the dial to the right mode and start shooting – no need to make any major
adjustments. If a bear popped out on the road, or an Eagle flew overhead, I was
ready to shoot in less than a second with exactly the settings I needed to get
great shots. If your camera has these, learn to set them and spend a day
exploring different situations that allow you to switch back and forth.
7. Black and White. You can always turn a color photo into
black and white, but try setting the camera to B&W and have at it. Not
having color to use forces you to look more at light and the impact it has on
your photos. Besides, it can be fun.
8. HDR – High Dynamic Range. HDR photography combines
multiple exposures of the same scene to make dramatic photos. Before trying
this, you need to make sure that you have software that can create HDR photos
and might want to look at some tutorials on the internet to learn a bit more
about how to take HDR photos. Play around with HDR – it can be a lot of fun.
More important – rather than making over-the-top HDR photos, you can use HDR to
make subtle enhancements to your photos to improve the overall quality of a
shot. I often use HDR to improve my shots of flying Bald Eagles by using
multiple copies of a single photo processed overly bright, overly dark and
right in the middle. This allows for the brown tones on the body to come
through without over-exposing the white head and tail. The result is a photo
the way your eye sees the bird rather than dark black and bright white.
9. Shoot at Night (without a flash). Mount your camera on a
tripod and take long exposure shots. A remote shutter release is helpful.
Exposures may be several minutes long. Oceans and moonlight can be spectacular!
There is no rule of thumb for this. It’s all trial and error.
10. Time-lapse Photography. The idea is to take a series of
photos to combine into a video to create a scene over time. Easy to do and very
cool. There is a lot of info on the internet explaining how to make these. You
will need to find some software that puts the photos together (you might
already have it on your computer). The low tech way to take the photos is to
place your camera on a tripod and take pictures at regular intervals. You can
buy a device called an Intervalometer that hooks to the camera that does all
the work for you. Beginners might want to start with clouds moving across the
sky. More ambitious folks might like to try star trails.
11. Ugly Ducklings. As a wildlife photographer, there are
certain species that are often overlooked as being “undesirable” such as
Starlings, Pigeons and such. If you take the time to photograph these birds in
flattering light they can really be quite handsome. Same goes for photographing
people. Not everyone has the looks of a runway model, but think of how many
stunning shots you’ve seen of old people. Think about the subjects that you
might have overlooked due to your own prejudices and give it a whirl.
12. Slow Shutter Speed. Using a slow shutter speed (say 1/50th
of a second) on a moving subject can be used to show motion. Look for subjects
like flowing water, cars, bike races, etc. A tripod is a must. Also, pretty
girls jogging in tight shorts can usually hit harder than you might think. A
bag of ice and a first aid kit might be helpful.
13. A Day In The Life. Follow someone around for a day and
document what they do. This can make a great gift for how you spend a special
day such as a birthday or anniversary and can be fun to look back on years
later. Another option is to document the day in the life of a pet. How does
Fluffy spend her day?
14. Video. Many cameras and cell phones have the ability to
shoot really nice quality video, especially if mounted on a tripod. A still
shot of a Hummingbird at a flower can be beautiful. Imagine the same bird on
video with sound. Give it a try – you might just get hooked.
15. Fireworks. Get out the tripod and head to the fair.
There are a lot of different ways to shoot fireworks, but most involve leaving
the shutter open for several seconds. A remote shutter release is helpful. You can open the shutter, wait for a rocket to
explode, then close the shutter. Alternately, leave the shutter open, cover the
front of the lens with a piece of black cardboard and remove the cardboard
repeatedly to capture multiple explosions. Lots of trial and error and it may
take a couple of events to get the hang of it. Hint – remote shutter releases
can be bought on ebay for far less than the manufacture charges. Expect to pay
about $10.
16. Moon Shots. There are lots of things to play with here.
Full moon rising, crescent moon setting in the sunset, clouds crossing the
moon. A long lens can make the moon look larger against the foreground. A full
moon throws off a lot of light, but a crescent moon may require a fairly slow
shutter speed. If you lens has image stabilization, you might want to turn it
off when using a slow shutter speed to avoid the lens “hunting” and causing a
blurry subject.
17. Self-portrait. These can be both fun and humbling. Set
the camera on a tripod and hit the self-timer. Get creative. Go to the park and
photograph yourself sitting on a bench wearing a tin-foil hat or explaining to
the police that you are not a danger to yourself or anyone else. Use the video
function to record yourself getting thrown out of the park and use it as
evidence in your suit charging that your first amendment rights were violated
and use the proceeds from the settlement to buy some really cool stuff.
18. Cars. Go to an antique car show and go wild. Try
low-angle shots with a wide angle lens or close-ups of cool wheels, chromed
engines or manufacturer emblems. Ask permission and/or offer to send the owner
photos. I’ve never had anyone say “No.” They work hard on their cars and are
usually flattered that you take an interest.
19. Flowers. Cloudy, windless days are best for flower
shots. If you haven’t photographed flowers in a while, get out there and get
creative. Find a lens combination that allows you to get close. Again, a tripod
is a must. Play around with depth-of-field, different angles, etc. If the
flowers are labeled with their names, take a shot of the labels too for future
reference.
20. Insects. Again, you probably want to get close, so use
the same combination as above. Insects can be very cool. Variations include
dragonflies, butterflies, spiders and whatever you happen to find. Shoot them
on flowers, white paper or a polished surface of a dark car. If you really want
a challenge, try to get them in flight.
21. Join a Critique Group. This can be done through a local
club, or on-line (Flickr has a number of these groups). Find somebody that will
be brutally honest (probably someone that doesn’t know you). This can be
humbling or sometimes aggravating. What you don’t want is for someone to stroke
your ego here. You want someone to hit you between the eyes and tell you how to
improve your photos. One person likened it to having someone tell you that your
kids are ugly. What you want is to have someone say, “Your kids are ugly, and
having met you, I know why.” My wife and I went to a class on taking travel
photos, and every photo the woman put up on the screen sucked. It’s a shame she
had to go all the way to Europe to take such lousy pictures.
22. Volunteer to Shoot an Event. Many local groups hold
fairs, picnics, or parades. Meet with the organizers and volunteer to
photograph the event for them. Provide them with photos for their website, newsletter,
etc. Going to the clean-up of a local park is more fun when you are holding a
camera rather than a garbage bag. Be a cub reporter for the day and document
the proceedings.
23. Go to a Sporting Event. It’s important to get permission
first, especially if minor children are present. Many organized team sports
require all participants to have signed releases in advance. The coaches can
tell you. Ask them if you could take some shots and give them copies. Adult softball
games might be a safer bet.
24. Traffic – Day time. Play with motion blurs, movement,
etc. In a big city, you can show traffic and congestion.
25. Traffic – Night time. Play with blurred lights and
motion. Be careful where you stand – drivers won’t be able to see you.
26. Body Parts. If you are taking photos at a sporting
event, think about focusing on a player’s feet in a soccer game or the arm of a
pitcher throwing a ball. Legs and feet can be some of the more interesting
subjects. Maybe just the feet of a diver entering the water.
27. Visit one of your favorite photo locations, but take a
step ladder. Shoot all the familiar scenes from a few feet higher. As long as
you act with confidence, people will not think that it is too strange.
28. Macro Photography. Get your hands on a macro lens, grab
the tripod and plan on getting dirty. Every-day objects can look very cool when
you shoot with a macro lens. An alternative to a macro lens is to add an
extension tube to a longer lens to allow for close focus.
29. Super Macro. If you already use a macro lens, try adding
a teleconverter, maybe even two, for super close shots. 1 to 1 shots are for
sissies! Think ginormous!
30. Take a photo outdoors of the exact same subject from the
exact same position every hour for an entire day to see how it changes as light
and weather change.
31. Shoot a magazine cover shot. Choose your subject and
create a photo with space for titles, etc and make sure that your subject fits.
32. Rule of Thirds – read up on the rule of thirds, if you
aren’t familiar with the concept and practice composing shots with this in
mind.
33. Look for Great Light. Take a walk, looking for objects
that are in great light. It doesn’t matter what the object is, only that the
light is good and take a photo of these items.
34. Play with Depth of Field. Take numerous shots of the
same subjects using progressively more or less depth of field by adjusting the
aperture.
35. Shoot on an Angle. Forget about horizontal and vertical.
Take photos at a 45 degree angle. Vary the angle as well.
36. Play with a Polarizer. Use a polarizer to see how it
changes the look of the sky, water, reflections on glass, etc.
37. Spend a day with a friend shooting photos of that friend
in artistic ways in different locations.
38. Photograph your Pet. Spend some time photographing a
pet. Think about shots that might look good on a calendar or magazine. As an
added bonus, you will have a lot of photos of your pet.
39. Photograph streets. City streets, country roads,
highways, dirt roads – have at it.
40. Panorama – If you have a software package that will
stitch together multiple shots into a panorama, get to it. If you are really
ambitious, try a 360 degree view. BTW – it’s best not to use an extremely wide
angle for this as the photos will be hard to fit together.
41. Zoom While Shooting. Using a long exposure, zoom in on
an object while the shutter is open to cause a blurred photo. Subject you might
want to try could include automobiles and lights.
42. Make a Softbox. Search on line for how to make a simple softbox/lightbox
from a cardboard box, paper, plastic, etc. Make one and photograph some common
objects.
43. Concert in the Park. Go to a local concert and
photograph the performers.
44. Photograph Moving Water. Streams, rivers, waterfalls,
sprinklers, faucets, whatever.
45. Reflections – Glass, Windows and Mirrors – take photos
where the reflection is the main focus of the shot.
46. Reflections – Puddles – Photograph the reflections in
puddles
47. Reflections – Sunglasses – you get the idea.
48. Abstract Patterns – look for patterns in object to make
the focus of your shots.
49. Take photos where color is the main subject of the
photo.
50. Water and Mirror Shots. Find an old mirror with a rim or
frame, lay it on a flat surface so that it is parallel to the ground. Pour water onto the mirror until the water is
at least a quarter of an inch deep. Shoot photos of the reflections in the
mirror. Flowering trees look fantastic!
51. Cloudy Days. Cloudy or hazy days when there is no wind
are perfect for taking close-up shots of flowers.
52. Break The Rules – take a series of shots that completely
break the “Rule of Thirds.”
53. Break The Rules – take a bunch of shots where the sun is
behind your subject.
54. Flash It. Dig the flash out of the closet, or use the
pop-up flash on the camera and play with it. Use the flash to fill in shadows
in the sun. Go out at night and look for unusual things in the yard to shoot.
You get the idea.
55. Continuous Focus Mode – Find a reason to use the
continuous (or AI Servo) focus mode and start shooting. Moving people, cars,
birds, animals – anything that stays in motion.
56. Old People. Find somebody old to photograph
57. Children. Find some children to photograph – make sure
that it is OK with their parents first!
58. Models. Find someone willing to pose for you and act as
a model. Direct them as to how and where to stand, what to do with their hands,
etc.
59. Couples. Any two people will do. Take photos of them
interacting.
60. Unusual Angles. Take photos from up high, down low –
anywhere but the usual.
61. Shadows. Take photos where shadows are the main subject
of the shot.
62. Frames and Borders. Find natural frames (trees,
buildings, etc.) that serve to frame your photo.
63. Photograph Food – Not just apples, go for the GOOD
stuff.
64. People Eating. Who looks good eating? Find out.
65. Photograph Trash. Not the garbage in the can, take a
walk around and take photos of things that have discarded. Maybe even consider
picking it up when you are done.
66. Doors. Find different doors and start shooting.
67. Rooms. Photograph different rooms and try to make them
beautiful. When photographing rooms of a house, try to make photographs that
would sell the house if they were in the real estate section.
68. Water. Look for all different kinds of water (lakes,
rivers, streams, puddles, waterfalls, drops of water on cars, etc.)
69. Architecture. Take shots of buildings that show off
something different.
70. Walk 100 paces and take pictures of 20 things from that
spot.
71. Light. Take photos of anything that shows remarkable
light.
72. Off Center. Take a series of photos where the subject is
well off-center.
73. Using a zoom lens, take multiple photos of the same
subject. Change YOUR distance from the subject and use the zoom to make the
subject the same size in the photo. Note how this changes the background of the
photo.
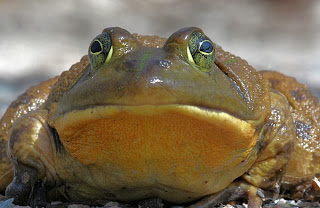
74. Shoot several photos of the same subject, but from the
perspective of a giant, and adult, a toddler and a frog.
75. Take as many photos as you can of an object such that
each photo is unique. Try to select an object that will give you additional
flexibility.
76. Take 76 photos of objects that have something in common
(same color, shape, size, begin with the same letter, etc.)
77. Pan with a moving object (bike, car, jogger) to show
motion - the subject is in focus, the background is blurred.
78. Take photos that portray emotions (love, anger,
happiness, etc.)
79. Photograph textures.
80. Take photos of weather – rain, snow, heat, cold, etc.
81. Do a photoshoot with a friend/model.
82. Light and Dark. Shoot a light subject on an almost
totally dark background.
83. Dark and Light. Shoot a subject against a totally white
background. Try to get the background as bright as possible without blowing out
any highlights.
84. Go For A Walk. Every 100 steps, take a photo of
something of interest.
85. Go For A Walk. Take a photo of an object that begins
with each letter of the alphabet in order. If you can’t find something, take
two shots of something beginning with the next letter.
86. Go For A Walk. Take a photo of every object you see that
begins with the letter “B.”
87. Go For A Walk. Take a small stuffed animal and
photograph it enjoying the area - seeing the sites, stopping for a rest, a
drink, etc. If someone asks what you are doing, just pretend that you don’t
speak their language.
88. Go To A Park. Sit on the toys (swings, slides, etc.) and
take photos that are unique because of where you are sitting. Swing your legs
and take photos of the sky, ground, etc. If you are clumsy, wear a helmet.
89. Produce. Take photos of produce in a farmer’s market
(ask permission first)
90. Clouds. Figure it out.
91. Chamber Of Commerce. Take photos of a community that
would draw tourists or business to the area.
92. Something Old. Take photos of old structures, cemeteries,
cars, etc.
93. Something New. Take photos of new things (construction,
seedlings, baby animals, etc.)
94. Fire. Take photos, don’t burn anything down or hurt
anyone.
95. Stones. Find the beauty in a pile of rocks.
96. Leading Lines. Take photos with leading lines that draw
your attention to a particular area or object in the photo.
97. Country Scenes. Go to farm country and capture photos
that really should be in a calendar.
98. Come up with five exercises that are not on this list.
99. Make a list of ten exercises that you will actually try.
100. Buy yourself an ice cream cone and enjoy life for a
couple of minutes.